Metal carports should be anchored using concrete anchors (for concrete slabs), mobile home anchors or auger anchors (for soil), rebar anchors (for temporary installations), or asphalt anchors (for paved surfaces). Proper anchoring requires installing anchors at 4-foot spacing or closer, ensuring they reach minimum depths of 24-36 inches for soil anchors, and securely connecting them to the carport frame with bolts or cables. Each anchor type provides different wind resistance levels, with proper spacing and depth being absolutely critical for structural stability during high wind and hurricane events. Let’s know about the anchoring thoroughly here. We have presented a step-by-step guide to properly anchor metal carports for strong wind protection.
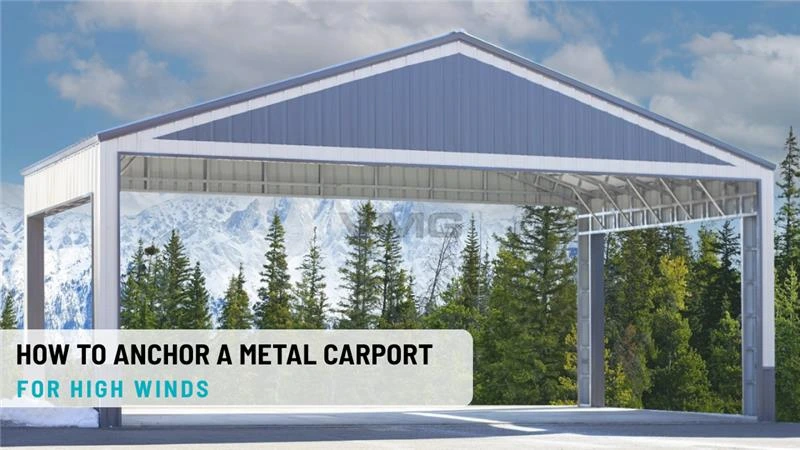
How Do You Anchor a Steel Carport for High Winds?
Steel carports should be anchored using the appropriate method for your foundation type:
- Concrete anchors for concrete slabs
- Mobile home anchors (auger anchors) for soil
- Rebar anchors for temporary installations
- Asphalt anchors for paved surfaces
Proper installation at 4-foot spacing and correct depth ensures maximum wind resistance and structural stability.
Why Anchoring a Metal Carport Is Critical for Safety
Before diving into the how-to, it’s essential to understand why anchoring your carport is non-negotiable. Prefabricated metal carports face unique challenges from wind exposure that most property owners underestimate.
-
Understanding Wind Uplift Pressure
Wind doesn’t just push sideways. It creates uplift pressure, which means wind pushes upward against the roof, trying to separate it from its base and foundation. Custom metal carports and prefabricated metal carports can weigh thousands of pounds, yet wind uplift pressure during hurricanes or major storms can exceed the total weight of the entire structure. Consider these facts:
- A 20-foot by 20-foot carport roof can experience uplift forces of 5,000-10,000 pounds in 75 mph winds
- Hurricane-force winds (over 150 mph) create uplift pressure exceeding 30,000 pounds on some structures
- Without anchors, your carport becomes a sail, with predictable catastrophic results
- Most insurance companies deny claims for unanchored carports damaged by wind
-
Safety Risks and Property Damage
An unanchored carport doesn’t just damage itself. It becomes a flying projectile that can damage surrounding property, injure people, or create liability issues. Proper anchoring prevents:
- Structural collapse and complete loss of the carport
- Vehicle damage from falling structures
- Damage to neighboring properties
- Personal injury liability
- Violation of local building codes and zoning ordinances
-
Local Building Code Requirements
Most building departments now require proof of proper anchoring before they’ll approve a metal carport installation. In high-wind areas like coastal regions and hurricane zones, building codes are particularly strict. Failure to follow these codes can result in fines, forced removal of the structure, or denial of insurance claims. Always check with your local building department before installation.
Types of Anchors Used for Custom Metal Carports
Different foundation types require different anchoring solutions. Choosing the wrong anchor type for your foundation can render your anchoring system nearly useless. Let’s explore each option in detail.
-
Concrete Anchors: The Strongest Option
Concrete anchors are the gold standard for permanent metal carport installations on solid concrete slabs.
How Concrete Anchors Work:
Concrete anchors, also called concrete bolts or wedge anchors, work by drilling holes into concrete and inserting threaded bolts that expand as they’re tightened, creating tremendous holding power. The anchor’s expansion creates a mechanical lock that resists pulling forces from wind uplift.
Installation Specifics:
- Concrete must be at least 3.5 inches thick
- Bolt diameter typically ranges from 0.5 inches to 1 inch
- Holes must be drilled precisely according to the carport manufacturer’s specifications
- Bolts must be sealed with caulk after installation to prevent water penetration
- Tensile strength typically exceeds 20,000 pounds per anchor
Best For:
Permanent installations on existing concrete slabs, commercial properties, and custom metal carports in high-wind areas. Concrete anchors are particularly ideal for double wide metal carport and large structures requiring maximum holding power.
-
Mobile Home Anchors (Auger Anchors): Best for Soil
Mobile home anchors, commonly called auger anchors or ground anchors, are spiral-shaped anchors designed specifically for soil, gravel, and dirt surfaces.
How Auger Anchors Work:
These anchors screw into the ground like a giant corkscrew, using their spiral design to create surface area and resistance within the soil. The deeper they’re installed, the stronger the holding power.
Installation Specifics:
- Minimum installation depth: 24-36 inches, depending on soil type
- Deeper installation in sandy soil (36+ inches) than in clay soil
- Installation involves either manual turning or power drilling
- Connection to carport frame using cable or rod assembly
- Typical holding power ranges from 2,000-4,000 pounds per anchor
Best For:
They are best suited for popular uses of prefab buildings to withstand harsh weather. These anchors work well for properties without concrete foundations and are the most common choice for RV metal carports on rural properties.
-
Rebar Anchors: Temporary Solution
Rebar anchors are simple anchors made from concrete rebar, pounded into the ground and connected to the carport frame with cables or straps. Consider them because the right frame for your carport is essential for making it wind-resistant.
Limitations and Considerations:
- Only 0.5 to 1 inch diameter rebar used
- Holding power typically 800-1,500 pounds per anchor
- Only driven 12-18 inches into the ground
- Subject to corrosion and rust over time
- Not recommended for permanent installations or high-wind areas
Best For:
Temporary installations, events, or short-term carport placements. Not suitable for permanent residential or commercial use.
-
Asphalt Anchors: Specialized Paved Surface Solution
Asphalt anchors are specialized fasteners designed specifically for paved surfaces, using mechanical resistance within asphalt layers.
Installation and Performance
- Requires professional installation equipment
- Asphalt must be at least 2 inches thick
- Holding power typically 2,000-3,000 pounds per anchor
- Subject to weakening as asphalt ages and cracks
- Require periodic inspection and potential re-tightening
Best For
Parking lots, commercial properties, and RV storage areas with existing asphalt. Most reliable when asphalt is relatively new and in good condition.
Anchor Type Comparison Table
| Anchor Type | Best Foundation | Max Depth | Holding Power | Durability |
| Concrete | Concrete slab | 3.5+ inches | 20,000 lbs | Excellent (40+ yrs) |
| Auger | Soil/Dirt | 24-36 inches | 2,000-4,000 lbs | Very Good (25+ yrs) |
| Rebar | Soil only | 12-18 inches | 800-1,500 lbs | Fair (5-10 yrs) |
| Asphalt | Asphalt | 2+ inches | 2,000-3,000 lbs | Good (15-20 yrs) |
Step-by-Step Guide to Anchoring Your Steel Carport
This detailed guide covers the complete anchoring process from start to finish. Follow each step carefully, whether you’re securing a double wide metal carport or a standard installation.
Step 1: Assess Your Foundation and Choose the Correct Anchor Type
This is the most critical decision in your anchoring process. Choosing the wrong anchor type will compromise your entire system.
Concrete Foundation Assessment
If you have an existing concrete slab or plan to pour one, concrete anchors are your best choice. Before selecting concrete anchors, verify:
- Concrete thickness is at least 3.5 inches
- Concrete is in good condition with no major cracks
- Concrete has fully cured (at least 28 days old for new pours)
You can locate the concrete outline for bolt placement. If concrete meets these requirements, concrete anchors will provide maximum holding power up to 20,000 pounds per anchor. It’s an effective method of installing strong utility carports.
Soil Foundation Assessment
If you have a natural soil or dirt foundation, auger anchors (mobile home anchors) are ideal. Test your soil by attempting to drive a metal rod into the ground. If the soil is hard, compact, and doesn’t contain large rocks, you have good conditions for auger anchors. Note: soft, sandy soil requires deeper installation (36+ inches). Clay soil allows shallower installation (24-30 inches) due to better holding power. Soil with many large rocks or an impenetrable hardpan layer may require concrete piers instead.
Asphalt Foundation Assessment
Asphalt surfaces work with specialized asphalt anchors. Check that asphalt is at least 2 inches thick and relatively new (less than 10 years old). Older, cracked asphalt provides weaker anchoring. Asphalt anchors work best on parking lots and commercial properties with thicker asphalt bases.
Step 2: Gather All Required Materials and Tools
Before beginning installation, ensure you have everything needed. Improper tools or missing materials will compromise your installation.
Required Materials
- Correct anchor type for your foundation (quantity per carport manufacturer specs)
- Bolts, nuts, and washers (stainless steel or galvanized for corrosion resistance)
- Polyurethane or silicone caulk (for concrete bolt sealing)
- Heavy-duty cable or rod assembly (if using auger anchors)
- Turnbuckles or tensioners (for final adjustments on cable systems)
Required Tools
- Power drill with concrete bits (for concrete anchors)
- Socket wrench set with appropriate sizes
- Torque wrench (to ensure proper tightening tension)
- Level (to verify carport frame alignment)
- Measuring tape (6-foot minimum for spacing verification)
- Chalk or marker (for marking anchor points)
- Safety equipment (gloves, safety glasses, dust masks)
Step 3: Position the Carport Frame Precisely
The position of your carport determines the entire anchoring layout. Improper positioning will create structural problems or ineffective anchoring.
Placement Guidelines
Place your metal carport in its final location, ensuring it’s level in all directions. For concrete pads, position the frame according to your marked bolt locations. For soil installation, position where you plan to install auger anchors. The frame must be stable and not rocking before you begin anchoring. Allow at least 12 inches of clearance on all sides from structures or obstructions. For RV metal carports, ensure adequate clearance above for tall vehicles (typically 14+ feet height minimum).
Verification Checklist
- Frame is level (check with level tool on each side)
- No rocking or movement in the frame
- All corners are square (measure diagonals – they should be equal)
- Adequate clearance from all surrounding structures
Step 4: Mark Anchor Installation Points
Proper spacing of anchor points is critical for effective wind resistance. Industry standards recommend anchor spacing of 4 feet or closer along each base rail.
Spacing Calculation
For a 20-foot wide carport, you need a minimum of 5 anchor points along each of the two sides (10 total for a standard single carport). For larger structures like a 32x32x20 vertical roof carport or a 24x41x10 RV metal carport, more anchors are required. Always consult your specific carport manufacturer’s documentation for exact spacing requirements, as this varies based on wind ratings and structure design.
Marking Procedure
- Measure the carport frame width and divide by the number of anchor points needed
- Starting from one corner, mark anchor points using chalk every 4 feet along the base rail
- Mark both sides of the frame
- Verify marks are square to the frame using a measuring tape
- Transfer marks to the ground or foundation directly below each frame marking
Step 5: Install Anchors at Each Base Rail Location
This is where the anchor type determines the installation process. Let’s cover each method in detail.
-
Concrete Anchor Installation
For concrete foundations:
- Using a power drill with concrete bit, drill holes at each marked location to a depth of 3.75-4 inches.
- Drill diameter should match the anchor bolt diameter (typically 0.75 or 1 inch).
- Clean each hole of dust and debris using a shop vacuum or compressed air
- Insert the concrete anchor bolt, ensuring the wedge portion seats properly in the hole
- Tighten the bolt gradually with a socket wrench, applying even pressure
- Once tight, apply polyurethane caulk around the bolt collar to seal against water penetration
- Allow caulk to cure per manufacturer specs (typically 24-48 hours) before proceeding
-
Auger Anchor Installation
For soil foundations:
- Position each auger anchor at the marked ground locations
- Using a power drill or auger tool, screw the anchor into the ground in a clockwise direction
- Drive to the minimum depth specified for your soil type (24 inches for clay, 36 inches for sand)
- Stop when the anchor reaches the appropriate depth; do not overtighten
- Verify the anchor eye is level with the ground
- Repeat for each anchor point, maintaining consistent depth and spacing
-
Asphalt Anchor Installation
For asphalt: Professional installation is strongly recommended. Asphalt anchors require specialized tools to cut through and seat properly in asphalt. Improper installation can damage the asphalt structure, creating water infiltration and further weakening. Contact a professional if you’re unsure about DIY asphalt anchor installation.
Step 6: Connect Anchors to the Carport Frame
Once anchors are installed in the ground or foundation, they must be securely connected to the carport frame structure.
Connection Methods
- Concrete anchors: Connect directly with bolts through the carport frame’s base rails
- Auger anchors: Connect via heavy-duty cable or rod, typically 3/8-inch diameter
- Asphalt anchors: Similar bolt connection as concrete
- All connections must include washers to prevent bolt/cable pullthrough
Tightening Procedure:
- Connect all bolts or cables hand-tight first (all anchors should be finger-snug)
- Using a torque wrench, gradually tighten each bolt to the manufacturer’s specified torque value
- For cable systems, use turnbuckles to achieve consistent tension across all anchor points
- Verify the frame hasn’t shifted during tightening by rechecking levelness
Step 7: Final Inspection and Testing
After installation, conduct a thorough inspection to ensure everything meets specifications.
Inspection Checklist:
- All anchors are present and installed to proper depth
- All bolts and connections are tight and show no movement
- Carport frame remains level and square
- No visible gaps between frame and anchors
- Concrete bolts are properly caulked and sealed
- Documentation and photos are taken for building code compliance
Pull Test (Optional but Recommended):
For critical installations, conduct a gentle pull test. Have someone carefully try to move the carport frame upward or sideways. There should be absolutely no movement. If any movement is detected, locate and re-tighten the responsible anchor immediately.
How to Improve Wind Resistance of Metal Carports
Beyond proper anchoring, several design features and installation practices significantly enhance the wind resistance of steel carports. Include some features for improved wind resistance.
Feature 1: Vertical Roof Designs
Roof shape dramatically affects how wind flows around and across your carport structure.
Why vertical roofs excel: Vertical or barn-style roofs shed wind more effectively than flat or traditional gable designs. Wind that hits a steep vertical roof is deflected upward and over the structure rather than creating uplift pressure underneath. The 20x21x7 Vertical Roof Metal Carport and 32x28x16 Vertical Roof Metal Carport designs specifically utilize this principle for high-wind areas.
Aerodynamic advantage: Sloped roofs concentrate wind pressure along the slope rather than spreading uplift pressure across the entire roof surface. This distributes forces more favorably to the anchoring system.
Selection tip: If you live in a high-wind area, specifically request a carport with a vertical or steep roof design rated for your wind speed.
Feature 2: Reinforced Braces and Support Systems
Diagonal and cross-bracing add structural strength and stability to the overall carport frame.
How reinforcement works: Additional braces resist lateral wind pressure and prevent frame racking (twisting). Extra support beams reduce the span between anchor points, creating more support paths for wind forces.
Engineering benefit: Reinforced structures can handle higher wind speeds because forces distribute across more frame members. The carport absorbs and redirects wind pressure rather than concentrating it at anchor points.
What to look for: Ask your carport supplier about reinforcement options. Premium carports often include additional bracing at no extra cost.
Feature 3: Certified Wind Ratings
Only purchase steel carports specifically tested and certified for wind resistance in your region.
What certification means: Wind-rated carports have been engineered and tested according to building code standards (typically ANSI/DASMA standards in the United States). Manufacturers provide documentation showing the carport’s performance at specific wind speeds.
How to verify: Request certification documents from manufacturers. Look for independent testing results, not just manufacturer claims. Reputable suppliers willingly provide this documentation.
Why it matters: Certified carports have been proven to perform in actual wind conditions. Non-certified carports offer no such assurance and may fail unpredictably.
Feature 4: Professional Installation
Having experts install your carport ensures every detail meets specifications and local building codes.
Installation expertise: Professionals understand proper anchor depth for your soil type, correct bolt tightening sequences, and local code requirements. They catch mistakes before they become problems.
Quality assurance: Professional installers provide documentation of proper installation, which is important for insurance claims and building code compliance. Their work is often warranted.
When to hire professionals: For large structures, high-wind areas, or if you’re unsure about any installation step, professional installation is worth the cost.
Maintenance Tips for Anchored Prefab Carports
Installation is just the beginning. Regular maintenance keeps your anchoring system effective and reliable throughout your carport’s lifespan.
-
Regular Anchor Tension Checks
Anchors can loosen over time due to vibration, temperature changes, and ground settling.
Checking procedure: Quarterly, use a socket wrench to verify that all bolts and connections remain tight. They should show no movement when turned. Pay special attention before and after harsh weather seasons.
Why it matters: Even slight loosening reduces holding power. A bolt that’s only 75% tight might hold during calm weather but fail in strong winds. Catching looseness early prevents catastrophic failure.
Seasonal focus: Perform tension checks in spring before warm-weather thunderstorm season and in late summer before hurricane season. These are periods of highest wind risk.
-
Inspecting Bolts and Fasteners
Bolts are the critical connection points between anchors and your carport frame.
What to inspect: Look for bent bolts, missing washers, stripped threads, or bolts that have backed out partially. Any of these conditions indicates a problem requiring immediate attention.
Replacement protocol: Replace any damaged bolts immediately with new ones of identical size and grade. Use stainless steel or galvanized bolts to resist corrosion.
Tightness verification: When you find a loose bolt, investigate why it loosened. Reapply thread-locking compound if available, and re-tighten to manufacturer specifications.
- Checking for Corrosion
Corrosion weakens both anchors and bolts, eventually compromising holding strength.
Corrosion indicators: Rust stains on bolts or anchor hardware, orange or brown discoloration on metal surfaces, or white powder residue on concrete anchors all signal corrosion.
Concrete anchor sealing: Properly sealed concrete bolts resist corrosion much better. If seals have cracked or failed, reapply polyurethane caulk.
Soil anchor care: Auger anchors are particularly susceptible to corrosion in wet soil. Inspect regularly and apply protective coatings if corrosion appears.
Remediation: Light surface rust can be cleaned with a wire brush. Heavy corrosion may require bolt replacement.
- Seasonal Inspection Protocol
Establishing a seasonal inspection routine catches problems before they become serious.
Spring inspection: After winter weather, check for frost heave (ground moving upward from freezing). Verify that soil anchors haven’t been pushed higher or lower by ground movement. Confirm no winter ice damage to bolts or connections.
Summer inspection: Before intense thunderstorm season, verify all connections are tight and no corrosion has developed.
Fall inspection: Before winter freeze cycles, inspect for any summer wear or corrosion. Ensure weatherproofing is intact.
Pre-hurricane inspection: In hurricane-prone areas, perform a complete inspection 2-3 weeks before hurricane season peaks. This gives time to address any issues before severe weather arrives.
Post-storm inspection: After any significant wind event, immediately inspect the entire anchoring system for damage, looseness, or movement. Document any issues with photos for insurance purposes.
Conclusion: Protecting Your Investment
Properly anchoring metal carports for high winds is one of the most important investments you can make in protecting your vehicles and property. Whether you own a custom metal boat carport, a double wide metal carport, or an RV metal carport, the anchoring process follows fundamental principles: choose the right anchor type for your foundation, install at proper spacing and depth, connect securely to the frame, and maintain your system regularly.
The cost of proper anchoring is minimal compared to the potential loss from wind damage. Don’t skip this step or cut corners. High winds come to everyone eventually, and the difference between a properly anchored carport and an unsecured one is often the difference between a protected asset and a total loss. Take time to do it right, and your steel carport will protect your vehicles for decades to come.
Ready to secure your carport properly? Use this guide as your reference, follow each step carefully, and consider consulting a professional installer if you’re unsure about any part of the process. Your vehicles deserve protection, and your peace of mind is worth the effort.
Frequently Asked Questions
Expand each item below to explore a few helpful answers before moving to the next blog post.
Yes, absolutely. Metal carports, especially in areas with wind or storms, must be properly anchored. Most building codes require it for safety and structural integrity. Insurance companies may deny claims for wind damage to unanchored carports.
For soil-based auger anchors, minimum depths are 24 inches for clay soil and 36 inches for sandy soil. This ensures anchors reach beyond frost lines and into stable soil layers. For concrete, bolts must penetrate fully through the concrete with proper caulking. Always follow your specific carport manufacturer's depth specifications.
Properly anchored and rated steel carports can withstand significant wind speeds. However, you must select a carport specifically rated for hurricane-force winds in your area. Standard carports rated for 80 mph won't necessarily survive 150+ mph hurricane winds. Choose your carport based on your region's maximum wind speed requirements.
Concrete anchors are stronger (up to 20,000 lbs holding power), but ground anchors work better for soil (2,000-4,000 lbs). Choose the anchor type that matches your foundation. Trying to use concrete anchors on soil or vice versa dramatically reduces holding power and effectiveness.
Yes, but it requires removing the anchors first. For concrete anchors, bolts must be cut or drilled out. For auger anchors, they must be unscrewed. This is labor-intensive and often not worth the cost. If you think you might relocate your carport, discuss relocation potential with your installer before initial anchoring.
Quarterly inspections are recommended, with more frequent checks before hurricane season. After any storm, immediately inspect the entire system for loose bolts, corrosion, or movement. Annual professional inspections are ideal for permanent installations.

