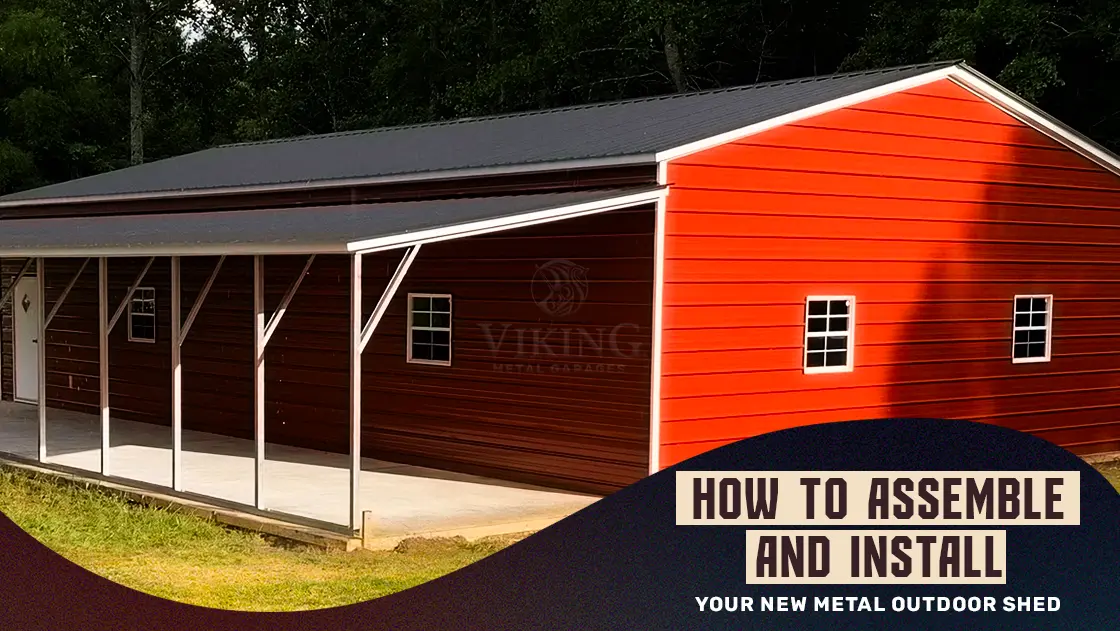
You finally pulled the trigger on a metal outdoor shed — and now the boxes are sitting in your driveway. Good news: this isn’t as complicated as it looks.
Metal outdoor sheds are designed to be homeowner-friendly. The components are pre-cut, pre-drilled, and engineered to fit together without a contractor. But there’s a right way to do this and a frustrating way. The difference usually comes down to site prep, foundation work, and not skipping steps to save time.
This guide walks you through the full installation process — from choosing a location to anchoring the finished structure — with the kind of practical detail that keeps your new shed standing straight for years.
Tools and Materials Checklist
Before anything else, get your tools staged and your PPE on. Starting an installation mid-project because you forgot a socket wrench wastes time and introduces errors.
Tools you’ll need:
- Power drill with Phillips and flat-head bits
- Socket set (typically 7/16″ and 1/2″)
- Rubber mallet
- Tape measure and carpenter’s square
- 4-foot level (longer is better for foundation work)
- String line and stakes (for squaring the site)
- Utility knife or tin snips
- Caulking gun (for silicone sealant)
- Ladder (for roof panel installation)
Safety gear:
- Safety glasses — metal edges and drilling create chips
- Work gloves — pre-drilled steel panels have sharp edges even when deburred
- Steel-toed boots
- Dust mask if you’re cutting, grinding, or working in a dusty site
- High-visibility vest if working near a driveway or road
Helpful but optional:
- Cordless impact driver (significantly speeds up panel fastening)
- Magnetic parts tray (keeps small fasteners from going missing)
- Second person — not optional for any shed wider than 8 feet
Read the manufacturer’s manual before you touch a single panel. Every shed kit is slightly different. The instructions are the authoritative source for your specific unit; this guide gives you the broader context and fills in the gaps.
From Box To Backyard: Installing Your Metal Shed
Step 1: Choose the Right Location
Pick your site before you pick up a tool. A bad location decision is far more expensive to fix after the shed is standing.
Drainage first. Water that pools near or under your shed will accelerate rust, undermine your foundation, and create a maintenance headache. Choose a spot where surface water naturally drains away from the structure. If your yard has low spots, avoid them — or plan to regrade before you build.
Check permit requirements. Most U.S. jurisdictions don’t require a permit for sheds under 100–120 square feet, but that threshold varies by county and municipality. Some areas have stricter rules, especially for structures with electrical or that are visible from the street. Call your local building department or check their website before breaking ground. Getting caught without a permit means potential fines and, in some cases, forced removal.
Know your setbacks. Most municipalities require sheds to be set back a minimum distance — often 5 to 10 feet — from property lines, fences, and existing structures. Some HOAs have additional restrictions. Verify before you stake your location.
Utility lines. Call 811 (the national “call before you dig” number) before any excavation or ground anchoring. Underground utilities are more common than homeowners expect, and hitting a gas or electrical line during anchor installation is a serious safety hazard.
Sun and access. Orient the doors for convenient daily access and, where possible, away from prevailing weather. A shed door that opens into the wind is harder to use and wears faster.
Step 2: Prepare the Ground
A perfectly assembled shed on a poorly prepared site will shift, warp, and cause you problems within a season or two. This step is worth doing right.
Clear the area completely. Remove sod, rocks, roots, and any vegetation in the footprint of the shed plus 12 inches around the perimeter. This prevents organic material from decomposing under the shed and creating settling issues.
Grade for drainage. The ground within your shed footprint should slope away from center — about 1/8 inch per foot — or be perfectly level if you’re pouring a concrete slab with designed drainage. Don’t leave the site with any areas where water will collect.
Level the site. An out-of-level foundation creates uneven stress on the frame. Over time, this causes panels to buckle, doors to stick, and fasteners to work loose. Use a string line and level to identify high and low points. Add compacted fill to low spots rather than excavating high spots when possible — it’s more stable.
Let soil settle. If you’ve added fill or disturbed the soil, give it 24 to 48 hours to settle before pouring concrete or beginning installation. A plate compactor speeds this up considerably.
Step 3: Lay the Foundation
This is the decision that affects your shed’s longevity more than any other single factor. Here’s how your options compare.
Foundation Comparison: Concrete vs. Gravel vs. Ground-Level
Concrete Slab — Best for Long-Term Durability
A poured concrete slab is the gold standard for metal storage sheds, especially for larger structures or anything you plan to keep for 10+ years. It provides a flat, rigid, permanent base that won’t shift, settle, or allow moisture wicking.
- Size the slab to the exact shed frame dimensions plus 6 inches on each side
- Minimum 4-inch thickness; 6 inches for heavier loads
- Slope the edges 1/4 inch per foot away from the structure for water runoff
- Allow a minimum of 28 days of cure time before installation if you’re pouring fresh concrete (7 days minimum in a pinch, but full cure is better)
- You’ll need concrete anchor bolts set into the slab while it’s wet — size and spacing per your shed manufacturer’s specs
Compacted Gravel Base — Good Middle Ground
A 4-to-6-inch layer of compacted crushed stone (¾” gravel) is a solid option for most residential sheds. It drains well, is DIY-friendly, and costs significantly less than a concrete pour.
- Use landscape fabric underneath to suppress weeds and keep gravel from mixing into soil
- Compact the gravel in 2-inch lifts with a plate compactor
- A level wood perimeter frame (pressure-treated 4×4 or 4×6 lumber) helps contain the gravel and provides a clean anchoring surface
- Best suited for sheds in moderate wind zones where ground anchors will be supplemental
Leveled Ground — Acceptable Only For Small, Temporary Sheds
Installing directly on native soil is possible for very small sheds — think 6×8 or smaller — but it’s the least durable option. Ground moisture accelerates corrosion on the base frame, and soil movement causes the structure to go out of square over time. If longevity matters, upgrade to at least a gravel base.
Step 4: Unpack and Organize Components
Before you begin installing shed frames, unpack every component and lay it out in an organized way.
Verify the parts list against the packing manifest in your manual. Missing hardware is common enough that checking now — not mid-install — is worth the time. Contact the supplier immediately if anything is missing or damaged.
Organization tip: Group similar items together — roof panels, wall panels, base rails, fastener hardware — and keep small fasteners in labeled containers or a magnetic parts tray. A zip-lock bag and a permanent marker work fine. Losing two bolts during assembly might seem minor, but it will cost you 20 minutes searching through the grass.
Don’t pre-assemble anything until you’ve read the full manual. Most installation mistakes happen because someone skipped ahead.
Step 5: Assemble the Frame
With a dry, cured, level foundation, you’re ready to start building.
Lay out the base rails and dry-fit them before fastening. Confirm the footprint is square by measuring both diagonals — they should be equal. A 1-inch difference in diagonal measurements means the foundation is out of square, and that error will compound throughout the rest of the installation.
Anchor the base rails to the foundation using the manufacturer-specified anchors. Concrete foundations use expansion anchors or wedge anchors; gravel or wood frame bases typically use auger-style ground anchors or structural screws. Tighten base anchors fully before proceeding.
Install the corner posts, roof bows, and hat channel in the order specified in your manual. Install fasteners finger-tight at first — don’t fully tighten until the entire frame is in place and verified square. Pre-drilled holes often require minor adjustments to align as the structure takes shape, and over-tightening early makes those adjustments difficult.
Once the full skeleton is assembled, do a final squareness check. Then go around and torque all fasteners to the manufacturer’s specification.
Step 6: Attach Roof and Wall Panels
Panel installation is where the shed really takes shape — and where small alignment errors become obvious.
Start with the roof. Lay panels across the roof bows and secure them with the specified fasteners. Work from one end to the other, keeping consistent overlap between adjacent panels. On a vertical roof configuration, install the ridge cap last to seal the peak. Structural trim along the eaves locks panels in place and closes off potential entry points for water and pests.
Vertical vs. horizontal roof panels: A vertical roof has panels running from peak to eave, which sheds water and debris better and is the preferred choice for higher-precipitation areas. A horizontal (regular) roof is the standard configuration and works fine in most climates. Your regional conditions and manufacturer options will determine what’s available.
Wall panels go on after the roof. Secure the gable ends (front and back) first, then the sidewalls. Attach each panel to the base frame and corners per the manual. Overlap panel seams in the direction that water would shed — meaning the upper panel overlaps the lower on vertical runs.
Check every panel joint for gaps. Even a small gap at a panel seam gives moisture and insects a route in. A bead of waterproof silicone sealant at any gaps, applied after full installation, handles this cleanly.
Step 7: Install Door and Window Frames and Panels
Follow your manufacturer’s instructions for door assembly — the sequence varies significantly between roll-up, sliding, walk-in, and double-hinged configurations.
General guidance:
- Install door tracks or runners before hanging door panels
- Hang panels and verify they open, close, and latch smoothly before fully tightening hardware
- Apply a light spray lubricant to all hinges, rollers, and sliding tracks
- If your shed has windows, seal around the frames with silicone after installation
Test every moving part before moving on. A door that doesn’t latch properly is far easier to adjust now than after the shed is anchored and loaded.
Step 8: Anchor the Shed to the Ground
Anchoring is not optional. An unanchored shed is a liability — in a serious windstorm, an unanchored metal structure becomes a projectile. Anchor systems are also required for most building permits.
How To Anchor A Metal Shed For High Winds
The right anchor system depends on your foundation type and local wind zone:
Concrete slab anchors: J-bolt or wedge anchor bolts set into the slab (ideally while the concrete is poured) provide the most secure attachment. Minimum four anchors — one at each corner — with additional anchors along the base rail every 4 to 6 feet for larger sheds.
Gravel or wood base anchors: Auger-style earth anchors screw into the soil through the base rail. For most residential applications, 24-inch helical ground anchors with tie-down straps provide adequate hold. These can be installed with a standard power drill and an auger bit.
High-wind zones: If you’re in a hurricane-prone area (Gulf Coast, Southeast Atlantic), a tornado corridor (central U.S.), or a high-wind mountain region, upgrade to heavier-gauge anchoring. A 12-gauge steel frame shed paired with properly installed concrete anchors handles significantly higher wind loads than a standard gauge structure on earth anchors. Consider consulting your local building department for specific requirements in your wind zone.
Anchors should be installed at every corner and, for sheds longer than 12 feet, at intermediate points along each base rail. Follow the manufacturer’s anchor spacing requirements — they’re engineered to the structure’s wind load rating.
Step 9: Add Finishing Touches and Accessories
Your shed is structurally complete. Now make it functional.
Interior organization options:
- Vertical wall shelving is the most space-efficient choice for tools and supplies
- Adjustable metal racks handle seasonal items, bins, and bulkier gear
- Pegboards (standard 1/4″ hole pattern) are ideal for hand tools — hang them on a dedicated wall section
- Overhead storage hooks or ceiling racks work well for items used infrequently, like holiday decorations or sports gear
- Clear storage bins with labels make finding things easy and keep the interior looking organized
Security additions: A padlock hasp or a keyed deadbolt significantly reduces opportunistic theft. Heavy-duty hasps with shrouded shackle padlocks are harder to defeat than standard hardware. If you’re storing high-value tools or equipment, consider a door sensor or a battery-operated alarm.
Final weatherproofing check: Walk the entire perimeter and inspect every panel seam, corner junction, and roof edge. Apply silicone sealant anywhere you see a gap or potential water entry point.
Bonus: Maintenance Tips For Your Metal Outdoor Shed
- Keep the shed organized and declutter it once a year — overloading racks stresses anchor points
- Trim vegetation to at least 12 inches from the walls — plants hold moisture against the panels and attract pests
- Wash the exterior annually with warm water and mild soap; avoid pressure washers on panel seams
- Remove overhanging branches that could fall on the roof
- Inspect fasteners annually and retighten any that have worked loose — thermal expansion and contraction loosens hardware over time
- Check anchor points each spring, especially after a severe storm season
- Touch up any scratched or chipped paint immediately to prevent rust from starting
Common Metal Shed Installation Mistakes
Learning from other people’s mistakes is faster and less expensive than making them yourself.
Skipping the site level check. An unlevel foundation is the single biggest cause of shed problems. Doors that won’t close, panels that buckle, and frames that visibly lean all start here. Use a 4-foot level and check in multiple directions before doing anything else.
Installing panels before the frame is square. Squareness errors in the frame are amplified as you add panels. Check diagonal measurements after the base rails are set and again after the frame is complete.
Over-tightening fasteners during assembly. Tighten everything finger-tight during assembly, do your squareness check, then torque to spec. Over-tightening early strips holes and creates alignment problems.
Skipping foundation prep to “save time.” Ground-level installation without a proper base seems faster until you’re re-leveling the shed 18 months later after the soil has settled unevenly.
Assembling alone. Most sheds wider than 8 feet need two people for safe panel installation. Trying to hold a 10-foot wall panel while drilling is how panels get bent and how people get hurt.
Installing in bad weather. Wet conditions make metal surfaces slippery and a windy day turns roof panels into sails. Wait for a dry, calm day. Your installation quality will be better and the job will go faster.
Not calling 811 before anchoring. Underground utilities are hit more often than anyone expects. This is a free service and takes one phone call.
How Long Does Metal Shed Installation Take?
Here’s an honest estimate based on shed size and experience level:
| Shed Size | Solo (First-Timer) | Two People (Some DIY Experience) |
| 6×8 or smaller | 4–6 hours | 2–3 hours |
| 8×10 to 10×12 | 6–8 hours | 3–5 hours |
| 12×16 to 12×20 | 8–12 hours | 5–7 hours |
| 14×20 | 12–16 hours | 7–10 hours |
These estimates assume a prepared, level foundation is already in place. Foundation work — gravel compaction or a concrete pour — adds time (and waiting time for concrete cure). Add 20–30% to any estimate if you’ve never done this type of work before. A first-time installer working from a clear set of instructions on a well-prepped site will come in at the low end; someone winging it on a rocky, sloped yard will come in at the high end.
DIY vs. Professional Installation
Viking Metal Garages includes delivery and installation in our final quote, which means you don’t have to make this call alone.
That said, here’s a straightforward breakdown:
DIY makes sense when:
- The shed is smaller than 10×12 and you have basic tool skills
- You have help — at least one other person for panel installation
- Your site is already prepped and level
- You have a full day (or weekend) available without interruption
Professional installation makes sense when:
- The shed is larger than 12×16
- Your site has significant grading, drainage, or access challenges
- You don’t have the tools, time, or physical ability to manage it safely
- You need a permitted installation with signed engineering documentation
For extra large sheds, equipment sheds, or metal car sheds, professional installation typically pays for itself in avoided errors and time savings.
Build With Viking Metal Garages For A Sturdy Outdoor Shed
Installation quality starts with a well-made shed. Viking Metal Garages builds metal outdoor sheds, metal garden sheds, and metal storage sheds to order — and we include delivery and installation in our final quote so you don’t have to manage the logistics alone.
Follow the steps in this guide, prep your site properly, and you’ll have a structure that holds up to whatever your yard — and your storage needs — throw at it.
Ready to get started? Call (704) 741-1587 or request a custom quote online. We’ll help you size, configure, and price the right shed for your property.
Frequently Asked Questions
Expand each item below to explore a few helpful answers before moving to the next blog post.
Yes. Most residential metal sheds are designed for homeowner assembly. You need basic tool skills, a helper for panel installation, a level site, and a clear day. Larger sheds — 12x20 and above — benefit significantly from professional installation.
Not always, but a foundation of some kind is strongly recommended. A compacted gravel base is a practical alternative to concrete for most residential applications. Installing directly on bare soil is only acceptable for very small sheds used short-term.
Yes. A properly compacted 4-to-6-inch gravel base with landscape fabric underneath is a solid foundation for most residential sheds. Use a wood perimeter frame to contain the gravel and provide a clean anchoring surface.
A two-person team can typically install a standard 10x12 shed in 3 to 5 hours on a prepped site. Larger sheds, site prep complications, and first-time assemblers add time. Foundation work is separate.
It depends on your municipality. Most jurisdictions exempt sheds under 100–120 square feet, but rules vary widely. Always verify with your local building department before installation.
At minimum: power drill, socket set, tape measure, 4-foot level, rubber mallet, and safety glasses. A cordless impact driver significantly speeds up panel fastening. Full list above.
Anchoring method depends on your foundation. Concrete slabs use wedge anchors or J-bolts; gravel and wood bases use auger-style earth anchors. Anchor at every corner and at 4-to-6-foot intervals along the base rail for larger structures.
A well-maintained metal shed on a proper foundation typically lasts 20 to 40 years. Galvanized steel framing and steel panels are resistant to rot, pests, and fire. Annual maintenance — cleaning, rust touch-up, fastener checks — is what keeps them in that range.
Metal panels are water-resistant, not waterproof. A properly installed shed with sealed panel seams, a proper foundation, and correct roof slope keeps water out effectively. Gaps at panel seams or an unlevel foundation can allow water intrusion. Silicone sealant at seams handles this.
A poured concrete slab is the most durable and longest-lasting foundation. A compacted gravel base is a practical second choice that most homeowners can install themselves. Bare leveled ground is the least durable option.
Yes. Fiberglass batt insulation and reflective bubble insulation can both be installed on the interior walls and ceiling. For a climate-controlled shed or a workspace you'll use year-round, insulation makes a significant difference in comfort and condensation control.
In most cases, no — standard residential sheds aren't designed for field expansion the way commercial metal buildings are. If you think you'll need more space, size up at purchase. Viking Metal Garages offers a range of sizes across metal sheds, storage sheds, and garden sheds — it's worth getting the right size from the start.
